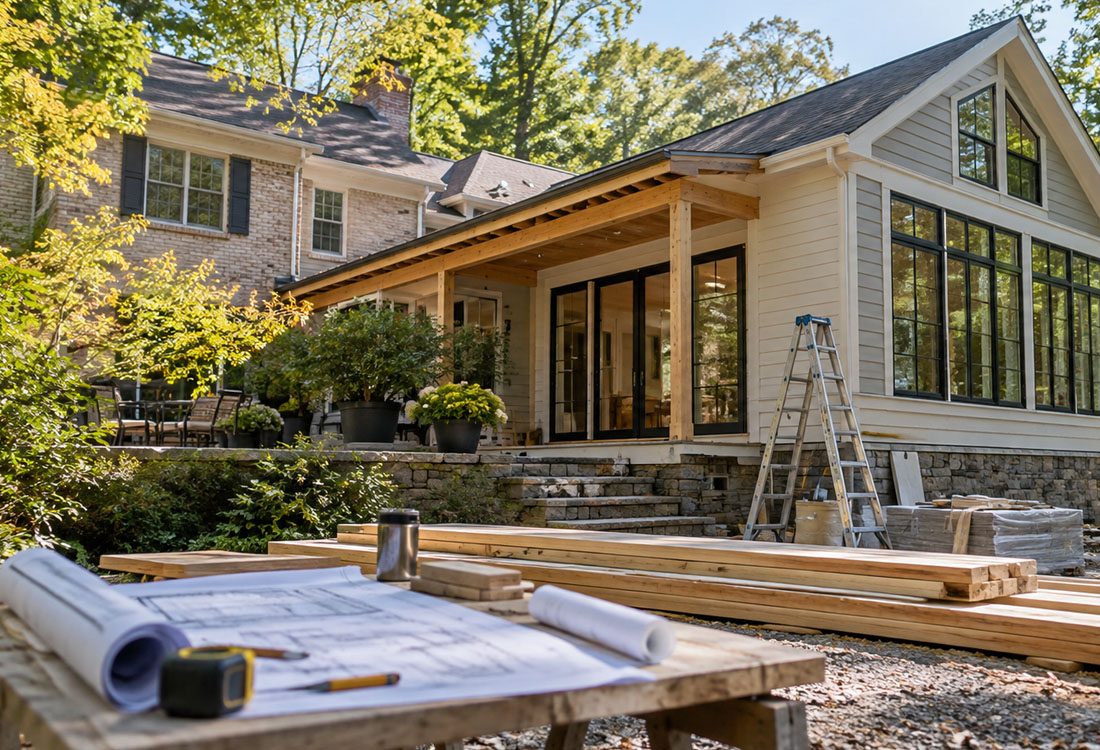
A custom home addition can give homeowners more space without requiring them to leave a home, neighborhood, or property they already value. Whether the goal is a larger kitchen, a primary suite, a home office, an expanded living area, or an entirely new wing, however, an addition is considerably more involved than simply building another room onto a house.
For homeowners considering a custom home addition in Chapel Hill, the process typically moves from feasibility and design through permitting, site preparation, construction, inspections, and final completion. The most successful projects also account for expenses that may not be obvious when the first budget is developed.
Understanding those potential surprises before construction begins can make the entire project more predictable.
Step 1: Determine What the Addition Needs to Accomplish
Before discussing square footage or finishes, homeowners should define why they need the addition.
Common goals include:
- Creating a first-floor primary suite
- Enlarging a kitchen and entertaining space
- Adding bedrooms or bathrooms
- Building a home office
- Creating a guest or in-law suite
- Adding a screened porch or four-season room
- Expanding a garage
- Creating additional living space for a growing or multigenerational household
This is an important distinction because two additions of similar size can have dramatically different construction requirements.
A 500-square-foot family room, for example, may require substantially less plumbing and mechanical work than a 500-square-foot primary suite containing a bathroom, walk-in closet, and specialized lighting.
Homeowners should establish priorities before design begins so the project is driven by how the home needs to function rather than simply by how much space can be added.
Step 2: Evaluate the Existing House and Property
The next step is determining what can realistically be built.
A qualified design and construction team will typically evaluate the existing home, foundation, roof structure, utilities, grading, drainage, property boundaries, and potential locations for the addition.
In Chapel Hill, the characteristics of the property itself can significantly influence the project. Wooded sites, sloping lots, drainage conditions, setbacks, existing easements, and impervious-surface considerations can all affect what can be built.
Properties inside Chapel Hill’s jurisdiction generally work through the Town’s applicable planning and permitting requirements rather than Orange County’s building-inspection process for unincorporated properties. Homeowners should verify jurisdiction early because requirements can vary by location.
Where Costs Can Creep Up: Surveys and Site Conditions
One of the first unexpected expenses can occur before construction begins.
A homeowner may discover that the project requires additional surveying, structural engineering, drainage planning, soil evaluation, or other professional services.
If property lines are uncertain, a new survey may also be needed before the design can be finalized.
Spending money during this phase can feel frustrating because construction has not technically started, but identifying these conditions early is considerably less expensive than redesigning an addition after permitting or excavation has begun.
Step 3: Develop the Addition’s Design
Once feasibility has been established, the design process begins.
This stage determines the floor plan, exterior architecture, windows, rooflines, circulation, structural connections, and relationship between the addition and the existing house.
A thoughtfully designed addition should feel like part of the original home rather than something that was attached years later.
That may require carefully matching:
- Roof pitches
- Ceiling heights
- Window proportions
- Exterior siding or masonry
- Trim details
- Flooring transitions
- Interior architectural details
Design should also consider how existing rooms will change once the addition is constructed. Sometimes building one new room requires modifying several existing rooms to create a logical layout.
Where Costs Can Creep Up: Expanding the Original Scope
This is one of the most common places for a budget to grow.
A homeowner might initially plan to add a family room but realize during design that the adjacent kitchen should also be opened up. That change might require removing structural walls, relocating cabinetry, moving plumbing, and replacing flooring throughout multiple rooms.
What began as an addition can gradually become an addition-and-renovation project.
Establishing clear priorities early helps prevent unnecessary scope expansion.
Step 4: Create Construction Documents and Engineering Plans
Once the overall design is approved, detailed construction documents are developed.
These plans may include architectural drawings, structural engineering, foundation details, electrical layouts, plumbing locations, mechanical systems, and other information needed for permitting and construction.
This stage transforms the homeowner’s concept into specific instructions that contractors can actually build.
Detailed plans can also reduce financial uncertainty because subcontractors and suppliers have more information when preparing their estimates.
Step 5: Finalize the Project Budget
Homeowners should receive a much clearer construction budget once the plans and specifications are developed.
The budget may include expenses such as:
- Demolition
- Excavation
- Foundations
- Framing
- Roofing
- Windows and doors
- Plumbing
- Electrical work
- HVAC
- Insulation
- Drywall
- Flooring
- Cabinetry
- Countertops
- Fixtures
- Interior trim
- Painting
- Exterior finishes
- Landscaping
Homeowners should pay particular attention to allowances.
An allowance is a placeholder amount for something that has not yet been selected. If the budget includes $8,000 for a certain category of finishes and the homeowner later selects products costing $12,000, the additional $4,000 becomes a budget increase.
Where Costs Can Creep Up: Finish Selections
Cabinetry, appliances, plumbing fixtures, flooring, lighting, tile, countertops, and specialty millwork can quickly move a project beyond its original budget.
The more selections homeowners can finalize before construction begins, the easier it becomes to understand the true project cost.
Step 6: Complete Permitting and Required Approvals
The plans must then move through the appropriate permitting and approval process.
The specific requirements depend on the property, jurisdiction, project scope, and existing conditions. Building, zoning, structural, mechanical, electrical, plumbing, environmental, or other reviews may become part of the process.
Properties involving septic systems can require additional consideration because an addition may affect the approved site layout or wastewater system. Orange County Environmental Health, for example, requires additions associated with certain septic or well applications to be represented on the approved site plan.
Homeowners should avoid assuming that permitting is simply an administrative formality. Design modifications requested during review can potentially affect both the construction schedule and budget.
Step 7: Prepare the Site and Begin Construction
Once required approvals are in place, physical construction can begin.
The site may need to be cleared and protected before excavation starts. Temporary fencing, tree protection, erosion-control measures, access routes, dumpsters, and material storage may also need to be established.
Excavation then exposes something homeowners cannot completely evaluate during design: what is actually below the ground.
Where Costs Can Creep Up: Excavation and Foundation Conditions
Unexpected rock, unsuitable soil, groundwater, drainage issues, or undocumented utilities can change foundation or site-work requirements.
These conditions may require additional excavation, engineered foundations, drainage improvements, retaining walls, or utility relocation.
This is one reason homeowners undertaking complex additions should maintain a construction contingency rather than committing every available dollar to the initial contract and finish selections.
Step 8: Connect the New Addition to the Existing Home
After the new foundation and framing are underway, the addition must eventually be connected to the existing structure.
This can be one of the most technically sensitive portions of the project.
Walls may need to be opened, rooflines tied together, existing framing reinforced, plumbing connected, electrical systems expanded, and HVAC systems modified.
Where Costs Can Creep Up: Problems Hidden Inside the Existing House
Construction sometimes reveals conditions that could not reasonably be identified beforehand.
Examples may include:
- Water damage
- Rot
- Inadequate framing
- Improper previous renovations
- Aging wiring
- Deteriorated plumbing
- Insufficient insulation
- Structural deficiencies
Older Chapel Hill homes may have gone through several renovations over their lifetimes, meaning today’s builder may discover construction methods or modifications that were never visible during initial planning.
These conditions do not necessarily mean a project was poorly planned. Renovating and expanding an existing structure always involves some degree of uncertainty.
Step 9: Upgrade Mechanical, Electrical, and Plumbing Systems
Adding square footage also means asking more from the home’s existing infrastructure.
An HVAC system designed for the original house may not have enough capacity for another bedroom wing. An electrical panel may need additional capacity. A water heater might need to support another bathroom.
These infrastructure upgrades are easy to overlook because homeowners naturally focus on the visible addition.
Where Costs Can Creep Up: Whole-Home System Improvements
A new addition may reveal that the most practical solution is upgrading a system serving the entire home rather than simply extending the old one.
That can increase the immediate construction budget, although it may also provide a better long-term solution.
Step 10: Complete Interior and Exterior Finishes
Once framing, rough plumbing, electrical work, mechanical work, insulation, and drywall are complete, the project begins to look like the finished home.
Cabinetry, tile, flooring, fixtures, paint, trim, appliances, and hardware are installed.
Exterior siding, masonry, roofing, gutters, patios, walkways, and other details are also completed.
Where Costs Can Creep Up: Matching Existing Materials
Matching an existing home can occasionally cost more than homeowners anticipate.
A discontinued brick, unusual hardwood flooring, custom trim profile, or older siding product may be difficult to reproduce.
Sometimes the best visual solution involves replacing more existing material so the transition between old and new looks intentional.
For a custom addition, that architectural continuity can be worth considering when establishing the original budget.
Step 11: Complete Inspections and Final Details
Construction projects typically require inspections at multiple stages rather than one inspection at the end.
Inspectors may review foundations, framing, plumbing, electrical systems, mechanical work, insulation, and final construction depending on the project.
After major construction is complete, the builder also performs finishing work and addresses outstanding details.
Homeowners should walk through the addition carefully and learn how new systems, fixtures, appliances, or specialty features operate before considering the project complete.
Do Not Forget the Cost of Restoring the Property
One final category is frequently underestimated: everything outside the new addition.
Construction equipment, excavation, deliveries, dumpsters, and foot traffic can affect lawns, driveways, landscaping, irrigation systems, patios, and planting beds.
Depending on the project, homeowners may need to budget for:
- Regrading
- Drainage improvements
- New grass or sod
- Landscaping
- Walkway replacement
- Driveway repairs
- Retaining walls
- Fencing
- Exterior lighting
These items may not technically be part of the addition itself, but they can be necessary to make the property feel complete again.
How Much Contingency Should a Homeowner Plan For?
There is no universal percentage that works for every addition, but maintaining a separate contingency is generally prudent.
For a relatively straightforward project on a newer home, the unknowns may be limited. An addition involving an older house, substantial structural modifications, complicated grading, or extensive remodeling may justify a larger reserve.
Rather than viewing contingency funds as money that must be spent, homeowners can treat them as financial protection against conditions that cannot be completely predicted before construction begins.
Planning a Custom Home Addition in Chapel Hill
A successful custom home addition in Chapel Hill starts long before excavation equipment arrives.
Homeowners need to understand the property, develop the design, evaluate infrastructure, establish realistic specifications, secure appropriate approvals, and create a budget that leaves room for uncertainty.
The lowest initial estimate is not necessarily the most predictable project. Detailed planning, experienced design guidance, thorough documentation, and transparent budgeting can be significantly more valuable than discovering major omissions after construction begins.
When evaluating a builder or design-build partner, homeowners should ask not only what the addition is expected to cost, but also what is included, what remains unknown, what allowances are being used, and where the builder believes additional costs are most likely to appear.
Those conversations can help turn a complicated construction project into a more informed, deliberate investment in the home.