Palm tattoos sit on one of the body’s most sensitive and hard-working surfaces. The skin is hairless and thick, packed with touch receptors and crossed by flexion creases that open and close hundreds of times a day. Sweat, constant handwashing, and contact with tools all work against ink retention. If you are drawn to the bold statement of palm work, you will achieve a more comfortable, longer-lasting result by understanding why the area feels intense under the needle, how placement and design affect sensation, and what to do before, during, and after your session. This practical guide explains the pain factors specific to palms and lays out a plan you can actually use.
Why Palms Feel So Intense Under the Needle
The palm is glabrous skin with dense tactile receptors and minimal cushioning over tendons and metacarpal bones. Vibrations from the machine transfer readily through this thin layer of fat, so even light passes can feel sharp. The skin must also be stretched firmly to get clean lines across dermal ridges and motion-heavy creases. That extra tension can spike sensation, especially near the base of the fingers and along the centerline where the hand naturally flexes. Combine this with the mental strain of holding a fixed hand position, and the discomfort feels different from, say, an upper arm tattoo.
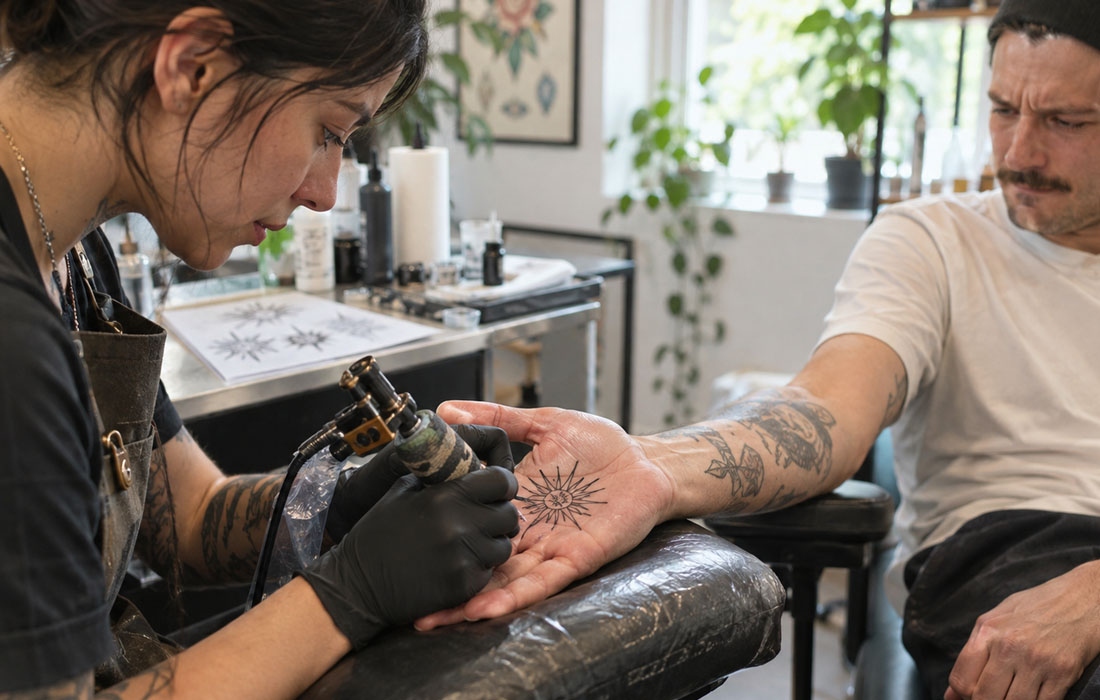
Palmar skin is also stubborn about keeping pigment. The thick stratum corneum and constant friction mean an artist may need slower, more controlled passes to seat ink without blowouts, and they may favor heavier liner groupings for bolder lines that outlast routine wear. That technique adds exposure time and intensity. It is why people ask how bad does a palm tattoo hurt. The honest answer depends on how your skin responds to this unique canvas and how the session is structured.
Placement and Design Choices That Change the Sensation
Not every spot on the palm feels the same. The thenar pad under the thumb and the hypothenar pad near the outer edge have more soft tissue and often feel deep and achy under pressure. The center, where dermal ridges are thick and creases converge, can sting more sharply, especially when the hand is stretched to flatten the area. Lines that cross major creases or sit near finger bases flex with every grip, so they may need more reinforcement during the session and are more sensitive while healing. By contrast, staying slightly off heavy fold lines may reduce both immediate sting and later irritation.
Design affects both sensation and longevity. Bold blackwork with medium- to heavy-line weights usually outlasts fine script because thinner lines can blur or fade quickly on this high-friction surface. Dotwork spreads sensation into many tiny taps but often requires more total time; large magnum groupings can shade smoothly but may feel intense if the artist must build saturation to overcome sweat and ridges. There is a real trade-off here: the cleaner and simpler the motif, the better it tends to age on palms, yet bolder lines and deeper saturation can feel tougher during the appointment.
Getting Through the Session: Practical Pain-Management Tactics
Plan for comfort before you sit down. Eat a solid meal with complex carbs and protein, hydrate well, and avoid alcohol, which can increase bleeding. Many artists prefer that clients avoid non-prescribed blood-thinning pain relievers; if you are considering any medication or topical anesthetic, discuss it with your artist ahead of time. During the session, steady breathing and a fixed focal point help you ride out sharper moments. Expect your artist to stretch and brace your palm firmly, rotate your wrist, and take brief resets. Short, planned breaks tend to be more helpful than frequent stops that prolong time spent on a very sensitive area.
Session logistics matter when your hands are abused daily. If you wrench on bolts or climb with chalk several times a week, book a start-of-week morning slot and keep your schedule light after the appointment to limit early friction. Ask your artist about pacing. Some palms do better with a clean outline pass and minimal shading on day one, then reinforcement or color on a separate visit. That approach reduces overworking, a common mistake that increases the risk of blowouts and swelling on this tight, high-pressure surface.
Healing on a High-Use Surface: What to Expect and Do
The first 48 hours bring the most tenderness. Expect mild swelling and clear plasma that needs gentle removal. Wash with lukewarm water and a fragrance-free soap, pat dry with a clean paper towel, and apply a very thin layer of a simple ointment or fragrance-free moisturizer. Many artists use an initial barrier film; others prefer open-air care on palms because sweat can pool. Follow your artist’s protocol and avoid soaking, scrubbing, or steaming the hand. Gloves can trap moisture, so if you must wear them, take frequent breaks to dry the area and reapply a light moisturizer.
Through weeks one to three, flaking arrives early, and heavy use can shear off delicate new skin. Resist picking at raised or peeling edges. Keep washing hands as required for hygiene, but pat, do not rub, and moisturize lightly after each wash. A bartender who dips into sanitizer all shift may carry single-use, unscented lotion packets and rotate tasks to give the tattooed hand pauses. Expect that fading or small gaps may appear after the first shed; palm work often needs a touch-up once the skin has fully settled. If redness or fluid increases after several days rather than easing, check in with your artist for guidance.
Palm tattoos can be worth the sting when their placement and purpose fit your life. The same features that make them striking also make them demanding: dense nerve endings, thick ridges, near-constant motion, and relentless contact. Choose designs that suit the surface, schedule your session when you can protect the area, and treat aftercare like part of the art. For some, a bold symbol on the thenar pad that can withstand tools and soap is the right choice; for others, the side of the hand or outer wrist offers similar impact with less daily punishment. Measure the commitment, then proceed with clear expectations and a plan to back them up.