A bathtub project can improve a bathroom without requiring a complete renovation. Whether the goal is easier cleaning, a deeper soaking space, or safer access, planning bathtub replacements carefully helps prevent costly changes after demolition begins.
The best results come from solving functional problems before selecting finishes. A new fixture should fit the room, work with the plumbing, support daily routines, and protect the surrounding walls and floor from water damage.
Why Homeowners Replace a Bathtub
Homeowners often replace tubs because of deep stains, worn finishes, cracks, persistent drainage issues, or hard-to-clean surfaces. Cosmetic aging is frustrating, but it is different from structural trouble. A crack that spreads, a tub that flexes underfoot, or recurring staining around the drain can point to a larger problem.
A replacement can also improve the way a bathroom works. For example, a family may replace a difficult-to-clean tub and surround while leaving the vanity, toilet, and flooring in place. This targeted approach can refresh the bathing area without expanding the project into a full-room remodel.
Inspect the Existing Space First
Before ordering a fixture, inspect what is already there. Measure the tub’s length, width, and depth, then note the drain and overflow locations. Check whether the new tub can fit through exterior doors, interior halls, stairways, and the bathroom doorway.
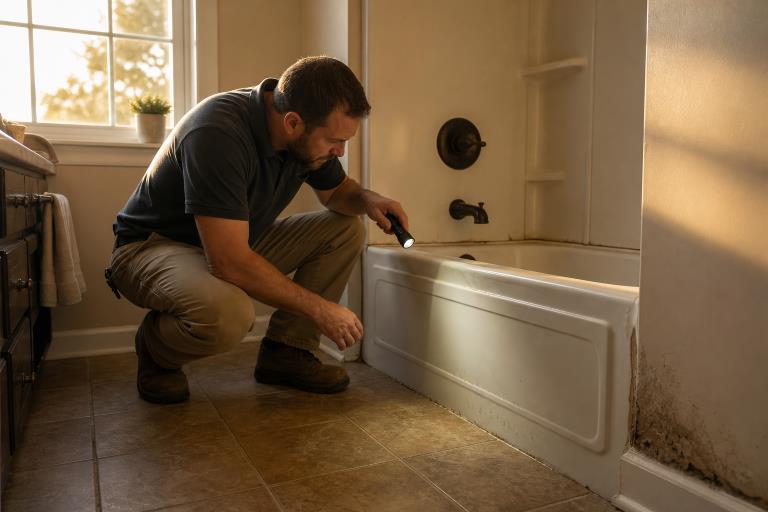
Look closely for soft flooring near the tub or toilet, bubbling paint, loose tile, failing caulk, musty odors, and stains that return after cleaning. These signs may indicate moisture behind the finished surfaces. Confirm that the existing supply lines, drain, venting, and shutoff valves can support the planned fixture.
Refinish, Line, or Replace?
Not every worn tub needs removal. Understanding the basic process of bathtub refinishing can help homeowners separate a surface-level issue from a deeper installation problem.
- Refinishing: Often suitable for a dull finish, light stains, chips, or minor surface wear. It does not correct serious cracks, leaks, corroded plumbing, or poor support beneath the tub.
- Bathtub liner: Can provide a faster visual update when the original tub is sound. It should not be used to hide ongoing moisture damage or movement in the fixture.
- Full replacement: Usually makes more sense when the tub leaks, flexes, has structural damage, fits poorly, or requires a major style or access upgrade.
Choose a Tub That Fits the Room
The largest tub is not automatically the best tub. Choose one that suits the room dimensions, floor structure, plumbing layout, and the people who will use it.
- Alcove tubs work well in standard three-wall spaces and tub-shower combinations.
- Soaking tubs offer added depth for homeowners who prefer baths.
- Corner tubs can make good use of an unusual bathroom layout.
- Freestanding tubs create a focal point but need open floor space and thoughtful plumbing placement.
- Walk-in tubs can support easier entry for users with mobility concerns.
Also consider tub weight, especially with cast iron or larger soaking models. The floor must support the fixture, water, and the occupant safely. Leave enough clear space for comfortable entry, cleaning, and routine movement through the room.
Check Plumbing and Waterproofing
Much of the important work happens behind the walls. Inspect the drain, overflow assembly, supply connections, and shutoff valves for corrosion or signs of past leaks. If the floor feels soft or the subfloor shows swelling, repairs should happen before the new tub is installed.
Waterproofing should direct water back into the tub, especially at seams, corners, wall transitions, and plumbing openings. Proper backing materials and sealed joints are essential because a polished surround cannot compensate for water reaching drywall, framing, or flooring.
Add Comfort and Safety Features
A replacement project is a practical time to address everyday frustrations and improve long-term usability. Small upgrades can make bathing more comfortable for children, adults, guests, and aging household members.
- Slip-resistant tub flooring
- Properly anchored grab bars near entry and bathing areas
- Handheld showerheads and easy-reach controls
- Lever-style faucet handles
- Built-in or removable seating
- Convenient shelves or recessed niches
Grab bars need solid structural backing or appropriate mounting hardware. A towel bar, suction handle, or decorative accessory is not designed to provide the same support during a slip or transfer.
Build a Practical Project Budget
A realistic budget includes more than the fixture price. Compare complete scopes of work, including old-tub removal and disposal, plumbing changes, wall or subfloor repairs, waterproofing, surround materials, fixtures, permits, labor, and cleanup.
Set aside a contingency for hidden damage, particularly in older bathrooms. Ask for written estimates that identify included materials, exclusions, payment stages, warranty terms, and the expected completion window. A low initial quote may not include repair work discovered after the old tub is removed.
Know What Happens During Installation
Most installations follow a similar sequence:
- Protect nearby floors, walls, and fixtures.
- Disconnect plumbing and remove the old tub and damaged surround materials.
- Inspect framing, pipes, wall surfaces, and subflooring.
- Repair leaks, moisture damage, weak support, or uneven surfaces.
- Set and level the new tub, then connect and test the drain.
- Install waterproof wall materials, fixtures, trim, and sealant.
- Run water, verify drainage, inspect seals, and clean the work area.
Timelines can change if workers uncover rot, plumbing defects, or layout issues. Keeping the tub in the same location generally limits these complications.
Questions to Ask Before Work Begins
- Will the new tub use the current drain location?
- What is the process if hidden water damage is found?
- Who handles permits and inspections if they are required?
- Which materials, fixtures, and finish details are included?
- How will dust, debris, and nearby surfaces be protected?
- How long must the tub remain unused after installation?
- What warranties apply to the tub, plumbing, wall system, and labor?
Final Planning Tips
A successful bathtub replacement begins with careful measurements and an honest assessment of water, plumbing, and structural conditions. Address hidden problems before choosing colors, doors, or trim. When the tub fits the room, the waterproofing is done correctly, and the scope is clear, the finished space can stay comfortable, safer, and easier to maintain for years.